


Snowshoeing for Beginners: Hike Tee Guide
Dominic PalmowskiSnowshoeing for beginners is one of the easiest ways to turn “ugh, winter” into “wait… this is actually magical?” — no ski lessons, lift ticket, or mountain-goat balance required. If you can walk, you can snowshoe; you just need the right gear, a sensible first route, and enough layers to avoid becoming either a sweaty burrito or a human popsicle.
The best part? Your first trip does not require a garage full of expensive winter hiking gear. Most beginners are better off renting snowshoes, choosing a short groomed trail, and learning what they actually like before buying anything fancy.
According to REI’s beginner snowshoeing guidance, the basics are simple: snowshoes sized for your weight and conditions, warm waterproof boots, layered clothing, and the Ten Essentials for safety. American Hiking Society also recommends carrying the Ten Essentials on every hike, with extra attention to navigation, insulation, water, food, and emergency gear in winter. For a deeper safety refresher, Hike Tee’s Ten Essentials hiking guide is a useful companion before you head out.
Let’s keep this practical. Here’s what you actually need — and what can wait.
Snowshoeing for Beginners: The Minimum-Viable Gear List
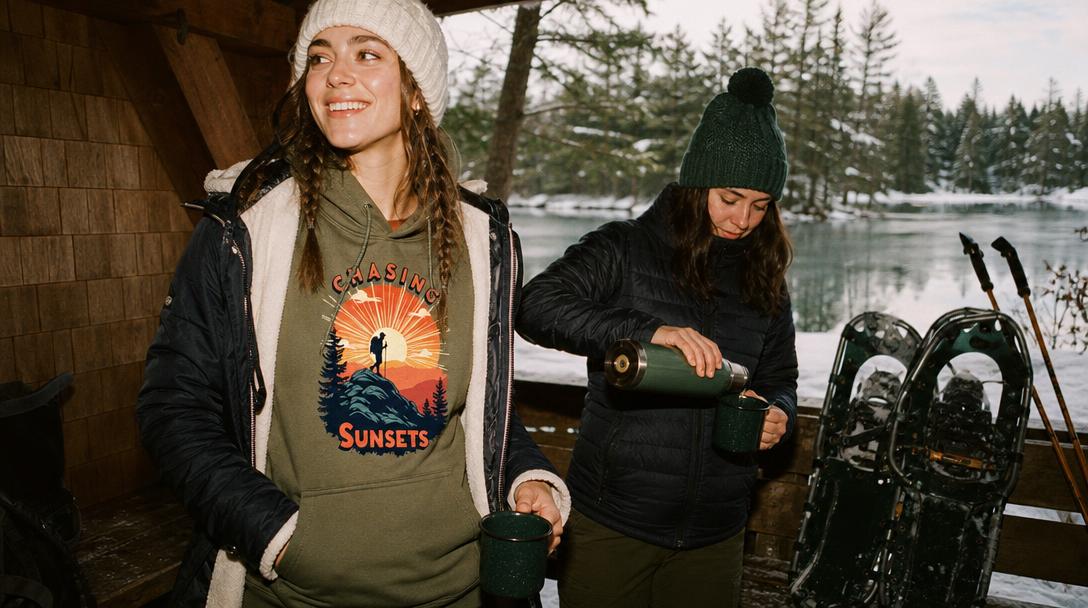
Your first snowshoeing trip only requires a few must-have items: properly sized snowshoes, waterproof boots, warm non-cotton layers, gloves, a hat, water, snacks, navigation, and basic emergency gear. Poles, gaiters, and insulated extras are strongly recommended, but you can rent or borrow many items before buying your own setup.
Think of beginner snowshoeing gear in three categories: must-have, recommended, and optional. This keeps you from panic-buying every shiny thing with a snowflake on the tag.
Must-have snowshoeing gear
These are the items you should not skip:
- Snowshoes matched to your total weight
- Waterproof winter boots or waterproof hiking boots
- Moisture-wicking base layers
- Warm insulating layer
- Weather-resistant outer layer
- Warm socks — wool or synthetic
- Gloves or mittens
- Warm hat or beanie
- Water
- High-energy snacks
- Navigation — map, offline app, or GPS
- Headlamp
- Basic first-aid kit
- Emergency blanket or bivy
- Phone with battery protection
That might look like a lot, but most of it overlaps with normal winter hiking gear. You probably already own several pieces.
Recommended gear that makes snowshoeing much easier
These are not always mandatory, but they make a big difference:
- Trekking poles with snow baskets for balance
- Gaiters to keep snow out of your boots
- Sunglasses or goggles for glare and wind
- Sunscreen and lip balm because snow reflects sunlight
- Extra socks and gloves
- Thermos with a warm drink
- Small repair kit or multitool
- Waterproof stuff sack for extra layers
Poles are especially helpful for beginners. They make you feel less like a startled raccoon on tennis rackets.
Optional gear for later
You can usually skip these on your first easy trip:
- Expensive technical mountain snowshoes
- Avalanche beacon, probe, and shovel unless you’re entering avalanche terrain
- Snowshoe flotation tails
- Heavy expedition parka
- Specialized snowshoe boots
- GPS watch
- Snow saw or backcountry snow tools
If your first trip is on a marked, low-angle trail or groomed Nordic center route, you do not need a full mountaineering kit.
Is Snowshoeing Beginner Friendly?
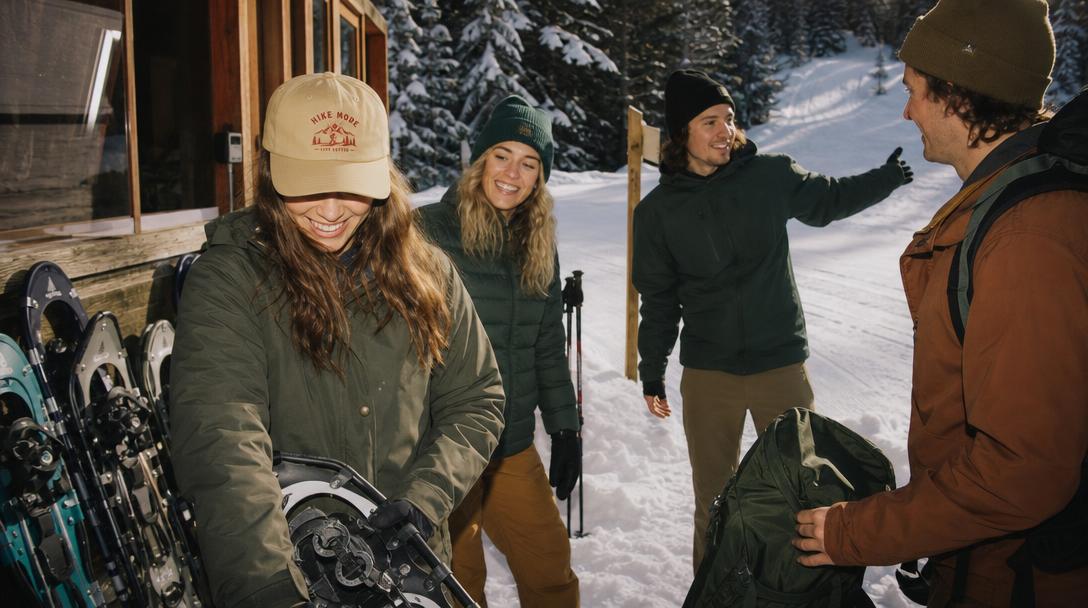
Yes, snowshoeing is very beginner friendly because the movement is basically walking with a slightly wider stance. Start on a short, flat, marked trail, rent properly sized snowshoes, wear warm waterproof layers, and go in good weather. Most beginners can enjoy their first outing without formal lessons.
That said, “easy to start” does not mean “impossible to overdo.” Snowshoeing can be more tiring than regular walking because you’re lifting extra weight on your feet and moving through snow. Deep powder, hills, wind, and cold temperatures all increase effort.
For your first outing, choose:
- A groomed snowshoe trail
- A flat park loop
- A Nordic center route
- A short national or state park trail that is open in winter
- A trail with clear signage and cell service if possible
Avoid starting with:
- Steep mountain routes
- Unmarked backcountry trails
- Avalanche terrain
- Frozen lakes or rivers
- Long routes with big elevation gain
- Trails where you’re unsure of the return distance
The National Park Service recommends checking winter trail conditions, carrying layers, water, snacks, traction, and navigation, and not relying solely on cell service in parks. That’s solid advice for snowshoeing too.
Do You Wear Your Own Boots When Snowshoeing?
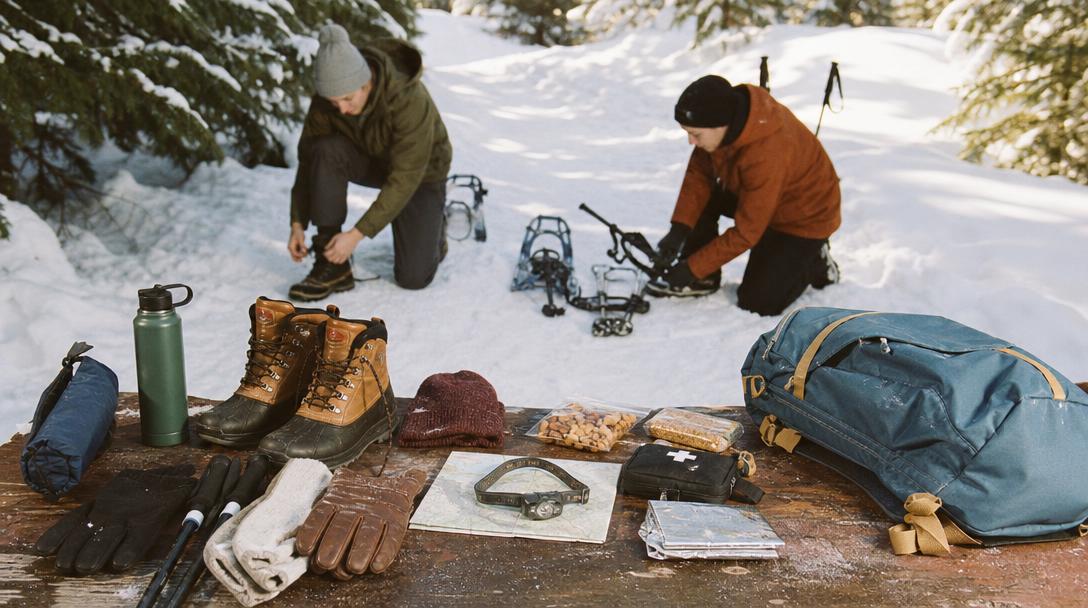
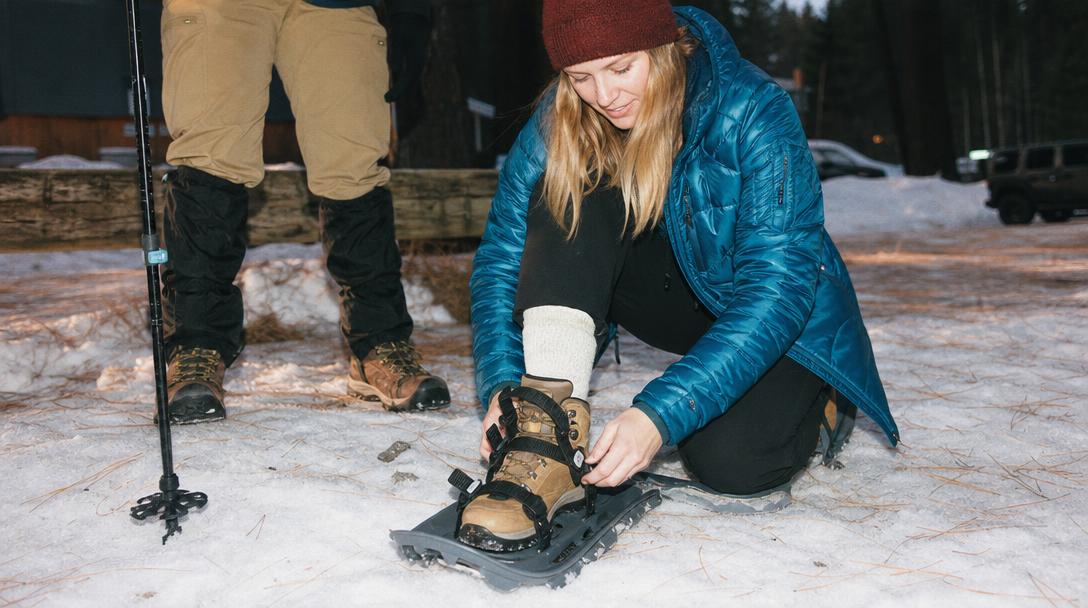
Yes, most people wear their own boots when snowshoeing. Snowshoe bindings are designed to fit many winter boots and hiking boots, not special snowshoe-only footwear. Your boots should be waterproof, warm, supportive, and comfortable with wool or synthetic socks.
You do not need ski boots. You do not need snowboard boots. You do not need to buy special boots just because you rented snowshoes.
Good boot options include:
- Insulated winter hiking boots
- Waterproof leather hiking boots
- Waterproof synthetic hiking boots
- Snow boots with a secure heel and decent ankle support
Avoid:
- Cotton sneakers
- Fashion boots with smooth soles
- Loose boots that slide inside the binding
- Boots that pinch with thick socks
- Non-waterproof footwear
Before you leave the rental shop or trailhead, step into the bindings and tighten them. Walk around for a minute. Your heel should lift naturally, but your boot should not twist sideways or slide forward.
What to Wear Snowshoeing: Snowshoeing Clothing for Beginners
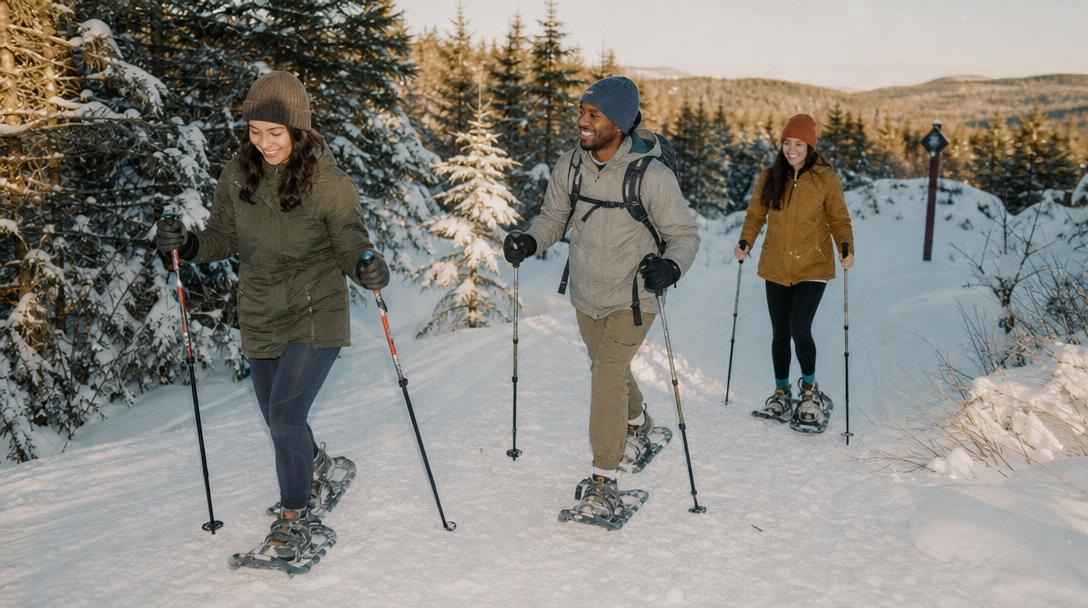
What to wear snowshoeing depends on temperature, wind, and effort, but the best beginner system is a moisture-wicking base layer, breathable insulating mid-layer, and windproof or waterproof outer layer. Avoid cotton because it traps moisture, chills quickly, and makes winter hiking less comfortable.
Snowshoeing warms you up faster than you expect. Many beginners overdress at the trailhead, then start sweating five minutes later. The trick is to start slightly cool and adjust as you move. For more cold-weather layering help, see Hike Tee’s guide to what to wear hiking in cold weather.
Base layer: keep sweat off your skin
Choose:
- Merino wool
- Synthetic polyester
- Synthetic blends
Avoid:
- Cotton T-shirts
- Cotton hoodies as your only active layer
- Jeans
- Heavy cotton sweatpants
Cotton holds moisture, and moisture is the villain in every winter trail story.
Mid-layer: breathable warmth
Good mid-layer options:
- Fleece pullover
- Lightweight insulated jacket
- Wool sweater
- Breathable sweatshirt or hoodie for easier conditions
A cozy sweatshirt can work well as a casual mid-layer on a mellow winter hike or post-trail campfire stop, especially if conditions are dry and you’re not pushing hard. Hike Tee’s Chasing Sunsets Hoodie fits that laid-back “snowy trail, warm drink, questionable raccoon joke” vibe — just pair casual cotton or cotton-blend layers with moisture-wicking pieces when you’re actively moving.
Outer layer: block wind and wet snow
Bring a shell that protects you from:
- Snow
- Wind
- Light freezing rain
- Brush dropping snow on your shoulders
A waterproof-breathable jacket is ideal. Snow pants, rain pants, or softshell pants can work depending on the weather and snow depth.
Accessories: small things, huge comfort
Pack or wear:
- Wool or synthetic socks
- Warm hat
- Neck gaiter or buff
- Waterproof gloves or mittens
- Lightweight liner gloves
- Sunglasses
- Sunscreen
- Lip balm
Yes, sunscreen in winter. Snow glare is sneaky. For dry trailhead hangouts, cabin weekends, or your post-snowshoe cocoa run, a casual Hike More Cap can round out the off-trail outfit, but bring a truly warm winter hat for active snowshoeing.
What to Pack for Snowshoeing: Screenshot-Friendly Day-Trip Checklist
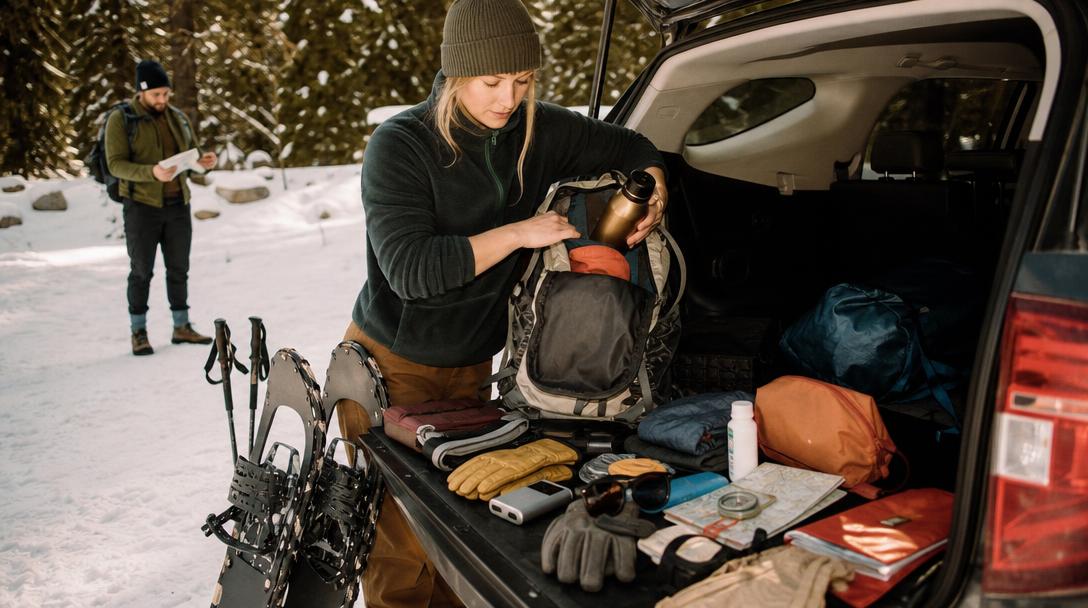
For a beginner snowshoeing day hike, pack water, snacks, extra insulation, navigation, headlamp, first aid, emergency shelter, fire starter, whistle, sun protection, spare socks, spare gloves, and a phone with backup power. Winter trips require more backup gear because cold, darkness, and weather make small delays more serious.
Screenshot this before your first trip:
Snowshoeing essentials for a day hike
- [ ] Snowshoes sized for your total loaded weight
- [ ] Waterproof boots
- [ ] Wool or synthetic socks
- [ ] Base layer — no cotton
- [ ] Insulating mid-layer
- [ ] Windproof or waterproof shell
- [ ] Gloves or mittens
- [ ] Warm hat
- [ ] Trekking poles with snow baskets
- [ ] Gaiters if snow is deep
- [ ] Water in an insulated bottle
- [ ] Snacks or lunch
- [ ] Offline map or paper map
- [ ] Compass or GPS backup
- [ ] Fully charged phone
- [ ] Battery bank for longer outings
- [ ] Headlamp
- [ ] First-aid kit
- [ ] Emergency blanket or bivy
- [ ] Whistle
- [ ] Fire starter
- [ ] Multitool or small repair kit
- [ ] Sunglasses or goggles
- [ ] Sunscreen
- [ ] Lip balm
- [ ] Extra socks
- [ ] Extra gloves
- [ ] Dry bag or zip bag for spare clothing
American Hiking Society recommends planning for about a half liter of water per hour in moderate conditions, though your needs vary by effort, temperature, and body size. In winter, keep bottles insulated or stored upside down so the lid is less likely to freeze shut.
Should Beginners Rent or Buy Snowshoes?
Beginners should usually rent snowshoes for their first one to three trips. Renting lets you test sizing, bindings, terrain preferences, and whether you actually enjoy snowshoeing before spending money. Buy when you know you’ll go regularly and understand your local snow conditions.
Here’s the easiest decision flow:
Rent if…
- It’s your first time.
- You only go once or twice per winter.
- You’re visiting a snowy area on vacation.
- You don’t know your ideal size yet.
- You want to try groomed trails before committing.
- You have kids who are still growing.
Buy if…
- You plan to snowshoe several times each season.
- Rentals are inconvenient or expensive near you.
- You know your usual terrain.
- You want a better fit or lighter setup.
- You go on spontaneous winter hikes.
- You’ve already rented and loved it.
Realistic beginner budget tiers
No brand ranking needed — just practical ranges:
-
Low-cost first trip: Rent snowshoes and poles, use existing winter layers and boots.
Best for: testing the activity. -
Basic personal setup: Buy entry-level recreational snowshoes, use existing winter hiking clothes.
Best for: groomed trails and local parks. -
Frequent-use setup: Buy snowshoes with better bindings, stronger traction, poles, gaiters, and refined layering.
Best for: regular winter hiking and varied conditions. -
Backcountry setup: Add avalanche gear, training, advanced navigation, emergency systems, and technical snowshoes.
Best for: experienced users only.
If you rent, ask the shop to size snowshoes based on your body plus pack weight and where you’re going.


