


Microspikes: Hike Tee Icy Trail Guide
Dominic PalmowskiMicrospikes can be the difference between a crisp winter hike and an unplanned luge lesson on packed snow and ice. Choose the wrong traction, though, and that spiky thing for your shoes may be useless, uncomfortable, or risky for the terrain underfoot.
Some traction devices are made for icy sidewalks. Some are great for rolling winter trails. Some belong on steep alpine routes where a fall could get serious fast. And some are overkill unless your weekend plans include words like glacier, front-pointing, or why did I agree to this.
Here’s the buyer-first, no-hype guide to choosing winter traction without getting buried in gear jargon. If you are building a full winter kit, pair this traction guide with a basic day hiking gear checklist so your spikes are not the only safety item in your pack.
| Traction Type | Material | Price | Best For | Not Ideal For |
|---|---|---|---|---|
| Coil-style ice cleats | Rubber harness with steel coils | $ | Sidewalks, parking lots, light ice, dog walks | Steep trails, hard ice, rocky terrain |
| Nano-style studs | Rubber harness with small carbide or steel studs | $$ | Urban paths, light trail use, trail running on mild ice | Deep packed snow, steep icy descents |
| Microspikes / trail spikes | Rubber or elastomer harness, chains, stainless steel spikes | $$–$$$ | Packed snow, icy hiking trails, rolling terrain, winter trailheads | Steep alpine ice, glacier travel, technical snow |
| Hiking crampons / flexible crampons | Steel or aluminum points with flexible bindings | $$$ | Firmer snow, moderate mountaineering approaches, more bite than spikes | Casual trails, lots of bare rock, incompatible soft shoes |
| Mountaineering crampons | Steel or aluminum frame with 10–12 longer points | $$$–$$$$ | Steep snow, hard ice, glacier routes, alpine terrain | Regular winter hiking trails, flexible footwear |
What Are Microspikes?

Microspikes are lightweight traction devices that stretch over shoes or boots and use small metal spikes underfoot to grip packed snow and ice. They are best for winter hiking on established trails, icy approaches, frozen dirt, and moderate slopes where you can still walk normally without technical climbing gear.
The word MICROspikes is technically a Kahtoola trademark, but many hikers use microspikes as a generic term for chain-and-spike trail traction. Think of them like tire chains for your hiking boots: not magic, but extremely helpful when the trail turns into a frozen luge track.
Most microspikes have:
- A stretchy rubber or elastomer harness that wraps around your shoe
- Chains or plates under the sole
- Short stainless steel spikes, often around 1/4 to 1/2 inch long
- Traction under both the forefoot and heel
- A compact design that packs easily into a daypack
According to Backpacker, these smaller traction devices are generally more flexible than mountaineering crampons and are designed for icy trails rather than technical climbing terrain. That flexibility is exactly why hikers love them: you can pull them on at a frozen trailhead, walk normally, and take them off when the trail turns rocky or dry.
They’re also one of those pieces of gear you don’t appreciate until you really need them. One minute you’re doing the careful penguin shuffle across a shaded patch of ice. The next, you’ve got spikes on and suddenly remember what confidence feels like.
Microspikes vs Crampons: What’s the Difference?
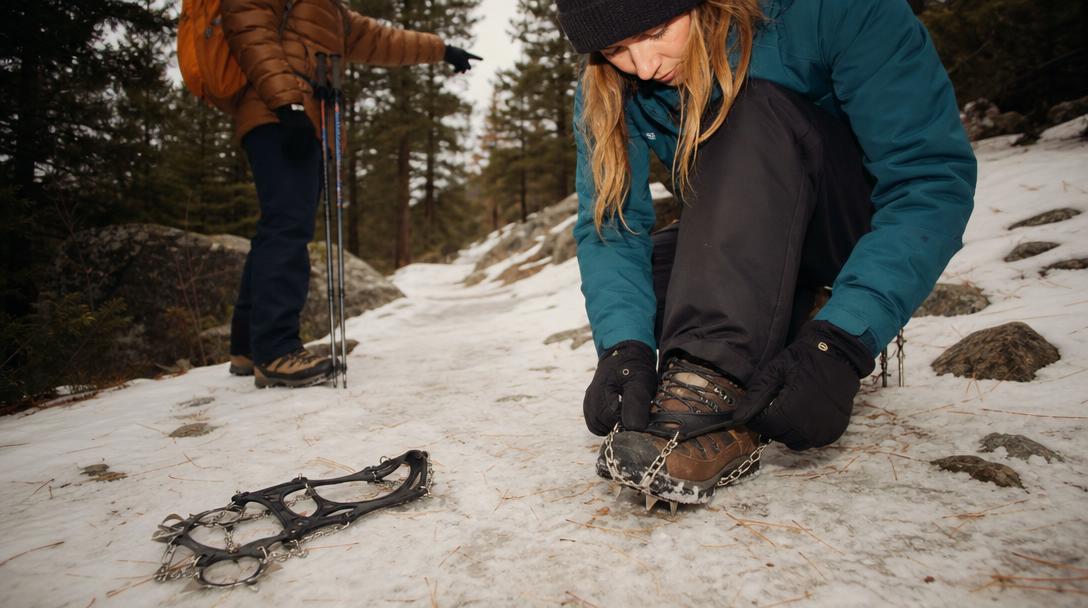
Microspikes are for non-technical icy trails, packed snow, and moderate winter hikes. Crampons are for steeper, harder snow or ice where longer points, boot compatibility, and winter travel skills matter. If the terrain is steep enough that you cannot keep your full foot planted, microspikes are usually not enough.
This is the biggest decision shoppers face, and it matters for safety.
The New Zealand Mountain Safety Council explains that microspikes are designed for compacted snow or thin ice on well-defined tracks where a slip is unlikely to have severe consequences. Crampons, on the other hand, are for more serious mountain terrain and require appropriate skills.
Choose microspikes when the route has:
- Packed snow on established trails
- Patchy ice on rolling terrain
- Frozen dirt or muddy sections
- Moderate inclines where you can walk normally
- Low-consequence slips, meaning a fall would be annoying but not catastrophic
Choose crampons when the route has:
- Steep hard snow
- Glare ice on slopes
- Alpine terrain above treeline
- Glacier travel
- Exposure where a slip could lead to a long fall
- Conditions that require an ice axe or self-arrest skills
Mammut gives a helpful rule of thumb: when you can no longer plant your full foot securely on the surface, you need crampons rather than microspikes. That doesn’t mean every steep trail automatically requires crampons, but it does mean your traction needs to match the hardest unavoidable section, not the easy first mile.
And yes, crampons do work on ice. That’s what they’re built for. But full crampons are not automatically better for normal hiking. They can feel awkward on flat trails, catch on pants or roots, and require compatible footwear. Wearing mountaineering crampons on a mellow icy trail can be like bringing a chainsaw to slice a bagel. Effective? Maybe. Appropriate? Not exactly.
How to Choose Microspikes for Winter Hiking
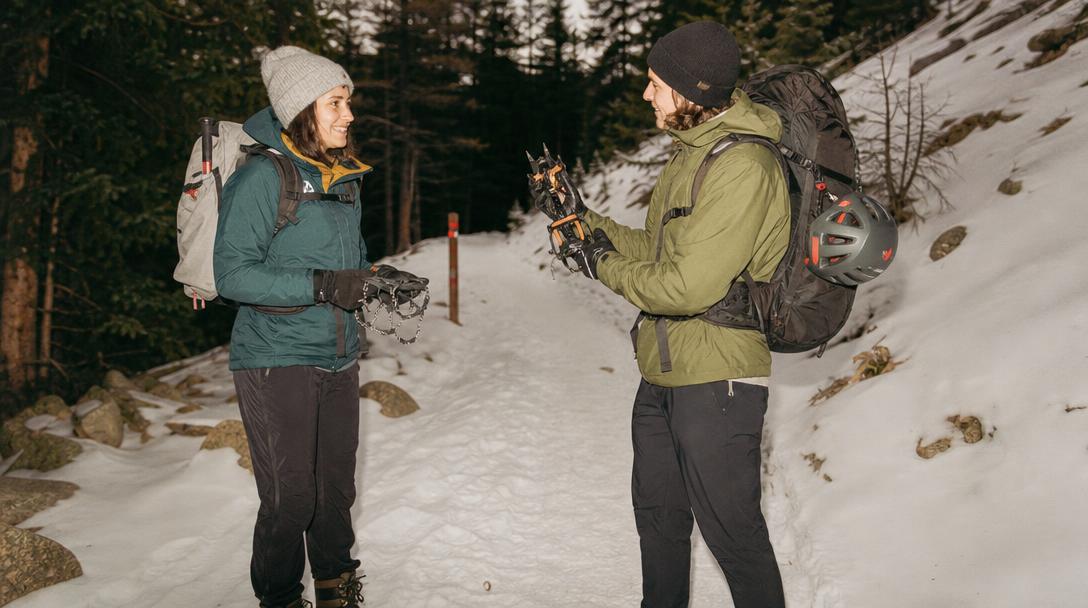
Choose microspikes for winter hiking by matching spike length, harness fit, footwear compatibility, terrain, and packability to your route. Prioritize durable steel spikes, secure heel retention, full underfoot coverage, and a snug fit that does not twist or pop off when walking uphill, downhill, or across uneven frozen ground.
When comparing options, avoid thinking only in terms of most aggressive equals best. The best microspikes for icy trails are the ones that fit your footwear, match your terrain, and are easy enough to carry that you actually bring them.
1. Match the traction to the terrain
Use this quick decision tree before buying, and again before leaving the house:
- Flat icy sidewalks or paved paths: Coil cleats or studded traction may be enough.
- Packed snow on hiking trails: Microspikes are usually the sweet spot.
- Icy trails with rolling hills: Microspikes with good heel and forefoot coverage are ideal.
- Glare ice on a slope: Consider whether crampons, an ice axe, or turning around is safer.
- Mixed rock, roots, snow, and ice: Microspikes work if you remove them on long dry sections.
- Steep alpine terrain: Use crampons, proper boots, and winter travel skills.
- Deep unconsolidated snow: You may need snowshoes instead of spikes.
The key question is not simply: Is there ice? It is: What happens if I fall here?
A small patch of ice on a flat forest trail is one thing. A frozen slope above rocks, water, or a steep drop is another beast entirely. Same ice, very different consequences. Nature loves nuance. Rude, but true.
2. Pick spike length based on grip needs
Most hiking microspikes use short spikes designed to bite into hard-packed snow and ice without feeling too clunky.
Look for:
- Shorter studs or low-profile spikes for running, light ice, and mixed pavement
- Medium trail spikes for general winter hiking
- Longer, more aggressive points for icier trails and steeper packed snow
If your hikes often include frozen waterfalls, steep gullies, or alpine snowfields, don’t just buy more aggressive microspikes. That may be crampon terrain.
3. Choose steel for durability
For most hikers, stainless steel or heat-treated steel spikes are the best choice. Steel grips well and holds up better on mixed surfaces than softer metals.
Aluminum can save weight, but it wears faster on rock. That matters if your winter hikes include exposed stone, rocky ridgelines, or trails where snow coverage comes and goes every five minutes like a toddler changing favorite snacks.
4. Consider packed size and weight
Microspikes for winter hiking are popular because they’re small enough to toss into a daypack. Many pairs weigh roughly 10–16 ounces, depending on size and design.
That’s light enough for:
- Winter day hikes
- National park trips
- Backpacking shoulder-season routes
- Van-life just-in-case trailhead kits
- Trail runners carrying traction for shaded icy sections
If you’re shopping for lightweight microspikes for trail runners, focus on lower-profile designs that fit securely without bouncing. Just remember: lighter usually means less bite. Great for speed, not always great for steep ice.
5. Dress for winter conditions, not just icy footing
Traction helps your feet grip, but it does not replace smart layering, gloves, navigation, or turnaround judgment. If you are hiking in freezing temperatures, review what to wear hiking in cold weather before you focus only on spikes.
Do Microspikes Work on Any Shoes?
Microspikes do not work equally well on every shoe. They fit best on hiking boots, winter boots, and sturdy trail runners with enough sole structure and a defined heel. They may slip on smooth-soled sneakers, soft casual shoes, bulky fashion boots, or footwear that does not hold the harness securely.
Footwear compatibility is one of the most overlooked buying factors. A traction device can have amazing spikes, but if it twists under your foot or pops off mid-descent, it’s not helping much.
Microspikes for Hiking Boots
Microspikes for hiking boots are usually the easiest match because boots provide:
- A stable sole platform
- A defined heel for the harness to grip
- Enough stiffness to keep the spikes aligned
- Better winter warmth and ankle support
If you wear insulated boots, pay close attention to sizing. Bulky winter boots may need a larger size than your regular hiking shoes. If your winter footwear is still a question mark, this guide to water-resistant hiking shoes can help you think through wet, slushy, and shoulder-season trail conditions.
Lightweight Microspikes for Trail Runners
Trail runners can work well with microspikes if they have a secure outsole shape and enough structure. Many winter hikers and fastpackers use this combo on packed snow.
However, trail runners are more flexible than boots. That can make some traction devices shift, especially on sidehills or uneven ice. Try them at home before trusting them five miles from the trailhead.
Shoes that are usually a poor match
Be cautious with:
- Minimalist shoes
- Smooth-soled sneakers
- Very soft casual shoes
- Oversized winter fashion boots
- Footwear with oddly shaped soles
- Shoes with no heel definition
If the device can slide forward, roll sideways, or pull off the heel, keep shopping or choose different footwear.
How Should Microspikes Fit?
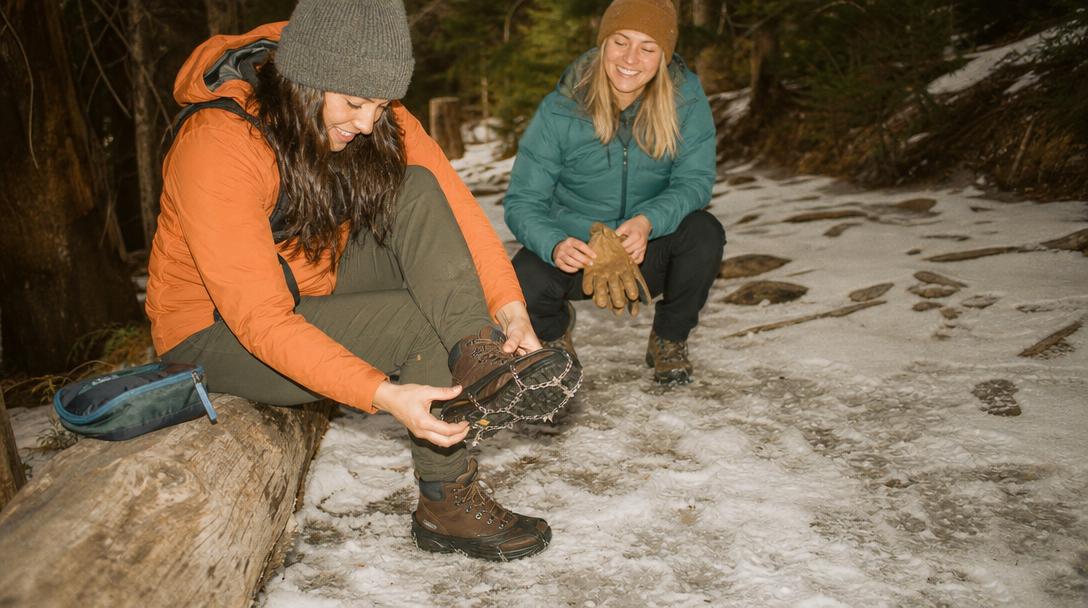
Microspikes should fit snugly, sit centered under the sole, and stay locked around the toe and heel without twisting, sagging, or overstretching. The front harness should wrap securely over the toe box, the heel band should stay seated, and the spikes should align under your forefoot and heel.
Fit is where a lot of bad traction complaints actually come from. The spikes may be fine; the sizing is wrong.
Use this step-by-step fit check at home:
- Put on the exact footwear you plan to hike in. Don’t test on sneakers if you’ll wear insulated boots.
- Stretch the front harness over the toe first. The rubber should sit flat, not folded or twisted.
- Pull the heel section up and over the back of the shoe. Make sure it rests securely above the heel, not halfway under it.
- Check underfoot alignment. The chains, plates, or spikes should be centered under your sole.
- Walk around on carpet or a rubber mat. Lift your knees, turn, step backward, and mimic uphill and downhill movements.
- Do a gentle twist test. If the traction rotates easily under your shoe, it may be too large.
- Check for overstretching. If the rubber looks maxed out or distorted, size up.
- Try them with gloves. Cold fingers have a talent for turning simple tasks into wilderness puzzles.
Sizing can change between footwear. A size medium might fit your summer hiking boots but be too tight on insulated winter boots. Wide boots can also require sizing up, especially if the harness pulls too hard across the toe box.
Best Microspikes for Icy Trails, Packed Snow, and Ice
The best microspikes for packed snow and ice are the ones that fit your exact footwear, match your terrain, and provide enough steel traction without being overbuilt for your hike. Rather than shopping by brand alone, compare spike material, underfoot coverage, harness security, durability, and ease of use.
Because Hike Tee doesn’t sell microspikes, and because this guide is about choosing rather than pushing, we’re skipping brand rankings. Instead, use this buyer checklist.
Look for:
- Steel spikes for durability on mixed winter trails
- Traction under heel and forefoot for downhill control
- A snug elastomer harness that won’t twist or pop off
- Correct sizing for your specific boots or shoes
- Packable weight you’ll actually carry
- Easy glove-friendly handling
- A storage bag to protect your pack and clothing
- Replacement or warranty support if you hike often
Avoid buying only on price. Cheap traction that slips off, rusts quickly, or breaks underfoot is not a bargain. It is trail confetti.
What Traction Should You Use by Terrain?

Use coil cleats or studs for flat light ice, microspikes for packed snow and moderate icy trails, crampons for steep hard snow or glare ice, and snowshoes for deep soft snow. On mixed rock and snow, use removable steel traction and take it off when bare rock dominates.
Flat ice
For parking lots, paved paths, and easy nature trails, light cleats or low-profile studs can be enough. Microspikes also work, but they may feel clunky on pavement.
Best choice:
- Coil cleats
- Studded traction
- Low-profile spikes
Packed snow
This is microspike country. If the trail is firm from foot traffic and your boots are sliding, microspikes add reliable bite without requiring technical movement.
Best choice:
- Microspikes
- Trail spikes with steel points
Glare ice
Glare ice is smooth, hard, and often unforgiving. Microspikes can help on flat glare ice, but they have limits on slopes. If the ice is steep or exposed, full crampons or turning around may be the safer call.
Best choice:
- Microspikes on flat or low-angle terrain
- Crampons on steep or consequential terrain
Mixed rock, roots, snow, and ice
This is where judgment matters. Microspikes are useful for icy patches, but bare rock dulls spikes and can make footing awkward. If dry sections are long, remove them and put them back on when ice returns.
Best choice:
- Steel microspikes for short mixed sections
- Frequent on and off transitions
- Patience, which sadly is not sold in gear shops
Steep alpine terrain
Microspikes are not mountaineering tools. If your route involves steep firm snow, high exposure, glacier travel, or the need to kick steps, you’re in crampon territory.
Best choice:
- Compatible mountaineering crampons
- Stiff boots
- Ice axe
- Training and route knowledge
When Should You Remove or Switch Traction?
Remove microspikes when bare rock, dry dirt, pavement, or roots dominate the trail, and put them back on when continuous ice or packed snow returns. Switch to crampons if the slope becomes steep, hard, exposed, or too firm for short spikes to provide secure purchase.
Mixed winter trails are common in national parks, Northeast forests, the Rockies, and shaded canyon routes. You might hike half a mile on dry dirt, hit a frozen creek crossing, walk packed snow through trees, then pop onto a rocky sunny ridge.
Keep microspikes on when:
- Ice appears every few steps
- Packed snow is continuous
- The trail is shaded and frozen
- Removing them would create repeated slip risk
Take microspikes off when:
- You’re walking mostly on bare rock
- The trail becomes dry dirt for a long stretch
- Spikes are catching on roots
- You’re on wood bridges or boardwalks
- You hear constant scraping instead of occasional crunching
Switch to crampons or turn around when:
- You can’t keep your full foot planted
- The slope is too steep to walk normally
- A slip would send you into rocks, trees, water, or off trail
- You need to front-point or kick steps
- You feel your spikes skittering instead of biting
A good habit: stop before the sketchy section, not in the middle of it. Put traction on while you’re standing safely, preferably before your body starts doing interpretive dance on ice.
How to Choose Microspikes by Use Case
The best traction setup depends on how you hike, how much weight you’ll carry, and how spicy your winter trails get. Beginner hikers, trail runners, backpackers, national park visitors, and van-lifers all need different balances of grip, durability, weight, packability, and ease of use.
Beginner winter hiker
Choose dependable, easy-on microspikes with full forefoot and heel coverage. Skip ultralight designs if you’re still learning winter footing.
Prioritize:
- Simple pull-on harness
- Durable steel spikes
- Clear left and right fit, if applicable
- Good grip on packed snow
- Easy handling with gloves
Trail runner
Look for lightweight microspikes for trail runners or low-profile studded traction. Fit is everything because bouncing, twisting, or heel slippage gets annoying fast.
Prioritize:
- Low weight
- Secure heel retention
- Flexible underfoot feel
- Compatibility with your exact running shoes
- Enough grip for shaded icy sections
Backpacker
Backpackers carrying heavier loads need more security. A small slip with a 30-pound pack can become a full-body yard sale.
Prioritize:
- More aggressive trail spikes
- Durable chains or plates
- Steel construction
- Reliable fit on boots
- Easy packability
National park visitor
For winter trips to parks with icy overlooks, packed popular trails, frozen steps, or snow-packed viewpoints, microspikes can be a smart addition.
Prioritize:
- Packable traction
- Easy on and off transitions
- Compatibility with hiking boots
- Enough grip for packed tourist trails
- A storage bag so spikes don’t chew up your layers
Van-lifer or road tripper
You may not know what conditions you’ll find until you arrive. Keep versatile steel microspikes in your vehicle kit for icy trailheads, frozen campsites, and surprise snow.
Prioritize:
- Durability
- Broad footwear compatibility
- Easy storage
- Quick deployment
- Rust resistance
Casual Winter Trail Layers for Low-Key Days
For slow overlook walks, snowy campground loops, post-hike coffee stops, and road trips where you are not relying on technical performance fabric, a comfortable cotton or cotton-blend graphic layer can be part of a casual winter outfit. This is not the layer you choose for sweaty alpine climbs, but it can be perfect for easy park days, travel days, and hanging around camp after the icy miles are done.
If you want a relaxed trail-town layer, the Journey Hoodie fits the cozy, casual side of winter exploring. For national park trips where the day includes viewpoints, short packed trails, and plenty of photo stops, the Zion National Park Sweatshirt is an easy throw-on layer for non-technical downtime.
Can I Pack Microspikes in My Carry-On?
You may be able to pack microspikes in carry-on luggage, but TSA officers make the final decision at security, and sharp traction devices can receive extra scrutiny. When possible, pack microspikes or crampons in checked luggage, cover the points, and check current TSA guidance before flying.
Practical flying tips:
- Pack traction devices in checked luggage when possible.
- Use a protective case or wrap the spikes.
- Keep them away from soft clothing that can snag.
- Don’t carry full mountaineering crampons in a personal item unless you enjoy awkward conversations.
- Check TSA guidance and your airline’s baggage rules before departure.
If your winter hiking trip depends on traction, checked luggage is usually the safer bet.
Do Crampons Work on Ice?
Crampons work very well on ice because their longer metal points are designed to penetrate hard snow and frozen surfaces. They are the correct tool for steep, firm, or consequential icy terrain, but they require compatible footwear and proper technique to use safely.
Crampons are not just stronger microspikes. They change how you move.
Full mountaineering crampons may have:
- 10 or 12 points
- Long downward-facing points
- Front points for steeper terrain
- Strap, hybrid, or step-in bindings
- Compatibility requirements based on boot stiffness and welt design
They work on ice, yes, but that doesn’t mean you should wear them everywhere. On mellow trails, crampons can be uncomfortable and awkward. They can catch on pants, trip you if your stance is too narrow, and damage surfaces.
Use crampons when conditions demand them, not because they look impressive clipped to a pack. The mountain does not award bonus points for dramatic gear.
Microspike Maintenance: Make Them Last Longer
Good microspikes are simple, but they still need care. A few minutes after each hike can prevent rust, dull points, and mystery smells from the damp corner of your gear bin.
After winter hikes:
- Shake off snow, mud, and grit.
- Rinse salt or road chemicals if you crossed treated pavement.
- Dry them fully before storage.
- Check chains, welds, plates, and rubber harnesses for damage.
- Look for bent or missing spikes.
- Store them in a tough pouch, not loose against clothing.
Before each hike, inspect them again. Rubber can crack, chains can wear, and spikes can dull, especially if you often hike mixed rock and ice.
Frequently Asked Questions
What is the difference between microspikes and crampons?
Microspikes use short spikes and flexible harnesses for packed snow and icy hiking trails. Crampons have longer points and are built for steeper, harder snow or ice, usually with stiffer, compatible boots.
Do microspikes work on any shoes?
No. Microspikes work best on hiking boots, winter boots, and sturdy trail runners with defined heels and structured soles. They may slip or twist on smooth sneakers, soft casual shoes, or bulky boots that don’t hold the harness securely.
Can I pack microspikes in my carry-on?
Sometimes, but it’s not guaranteed. TSA officers make the final decision at the checkpoint, so the safest option is to pack microspikes in checked luggage with the points covered.
Do crampons work on ice?
Yes, crampons work on ice and are designed for steep, firm, or technical frozen terrain. They provide more bite than microspikes but require compatible footwear and proper technique.
What are the best micro spikes?
The best micro spikes are durable steel models that fit your footwear snugly, provide heel and forefoot traction, and match your terrain. For most hikers, the best microspikes for packed snow and ice are secure, easy to put on, and sturdy enough for mixed winter trails.
How should microspikes fit on hiking boots?
Microspikes should fit snugly without twisting, sagging, or overstretching. The harness should sit securely over the toe and heel, while the spikes stay centered under the forefoot and heel of your hiking boots.
Final Trail Notes: Choose for the Fall, Not Just the Footing
Winter traction is really about one question: What happens if you slip?
For mellow icy trails and packed snow, microspikes are often the perfect tool: simple, packable, and confidence-boosting. For sidewalks and light ice, low-profile cleats may be enough. For steep, hard, exposed terrain, crampons and real winter travel skills are the safer choice.
Quick takeaways:
- Use microspikes for winter hiking on packed snow and moderate icy trails.
- Choose crampons for steep hard snow, glare ice, glaciers, and consequential terrain.
- Fit-test traction on the exact boots or shoes you’ll wear.
- Remove spikes on long bare-rock sections to prevent wear and awkward footing.
- Pack traction before you need it, not after the trail becomes an ice rink.
A little grip goes a long way. And if the trail still feels beyond your comfort zone, there’s no shame in turning around, finding a lower-elevation walk, and saving the summit for a less slippery day. The mountain will still be there. Your tailbone would like to be, too.


